Saturday, March 16, 2024

Cacabelos, Spain, January 3, 1809

Alan and I took a break from the Spanish/French scenarios that our friend Brian North has been cranking out these days to try adapting the Cacabelos scenario from Michael Hopper’s scenario book, Perfidious Albion. Michael’s scenarios are written to be adapted to any rule set and with a bit of effort I was able to convert this one to our rule set of choice, Over the Hills. I tweaked things a bit, allowed movement of horse through the winter orchard terrain north and south of the village (but no charge or cavalry advantage over infantry), along with a few other things. We also allowed the two large British skirmish battalions (1/52nd Light and 1/95th Rifles) to split into two smaller units each, operating as they often did as smaller contingents. The big appeal of this scenario was that it employs dismounted Dragoons (not those converted to infantry battalions in other theatres of the war, but rather mounted Dragoons assuming a skirmish role) as I had been wanting to paint up some Strelets figures that I had.

The scenario takes place during Moore’s winter retreat from Spain to Corunna. A dispirited British army was largely only saved by the rearguard actions such as that at Cacabelos by the Reserve Division, buying the British enough time to stay ahead of the French pursuit. In this scenario the prime British objective is to stop the French from crossing the river, while the French hope is to achieve a foothold on the far bank by game’s end in order to continue the pursuit.


Our game was played on an 4’ X 6’ table using my 1/72 toy soldiers and the Over the Hills rule set.


The Battlefield

Cacabelos straddles the road on the French side of the river. Winter orchards line the bank on both sides, making it difficult for Merle to effectively employ his massive cavalry advantage in this scenario.


British Deployment

Paget, in command of the rearguard, opts for a strong presence (top) on the French east side of the river, holding Cacabelos with the 1/20th Line, while Anstruther’s 95th Rifles assume positions in the orchards on either side of the village. The 15th Hussars are on the road in Cacabelos, having just ridden back to inform Paget of the approach of the French vanguard.

On the west (bottom) side of the river, the 1/52nd guard the bank either side of the bridge (some companies off photo to the right) while Disney’s brigade (1/28th and 1/91st) are in reserve in the orchard, flanking the guns.


The 1/20th garrison Cacabelos


Rifles in orchards south of Cacabelos


More Rifles north of Cacabelos


1/52nd along the banks of the river


Horse battery watches the bridge

Paget sights his battery of 6 pdrs. on the bridge


Colbert's vanguard advances on Cacabelos

The first French cavalry arrive in pursuit, Colbert’s 3rd Hussars and 15th Chausseurs. Seeing Cacabelos strongly defended, Colbert holds his light horse in front of the village in order to assay the situation (not especially historical in its accuracy).


Lahoussaye's 3rd Dragoon Division arrives, moves to right

The French Dragoons (two brigades, the 17th and 27th under Marisy and the 18th and 19th under Caulaincourt) move upstream to the right to look for a ford across the river.


1/52nd companies sent to the British left

The 1/52nd companies guarding the north side of the bridge are dispatched under Paget’s orders to shadow the Dragoons along the river and block any attempt to cross.


15th Hussars retreat from Cacabelos

Badly outnumbered by the French horse, the 15th Hussars gallop across the bridge and go into reserve behind Disney.
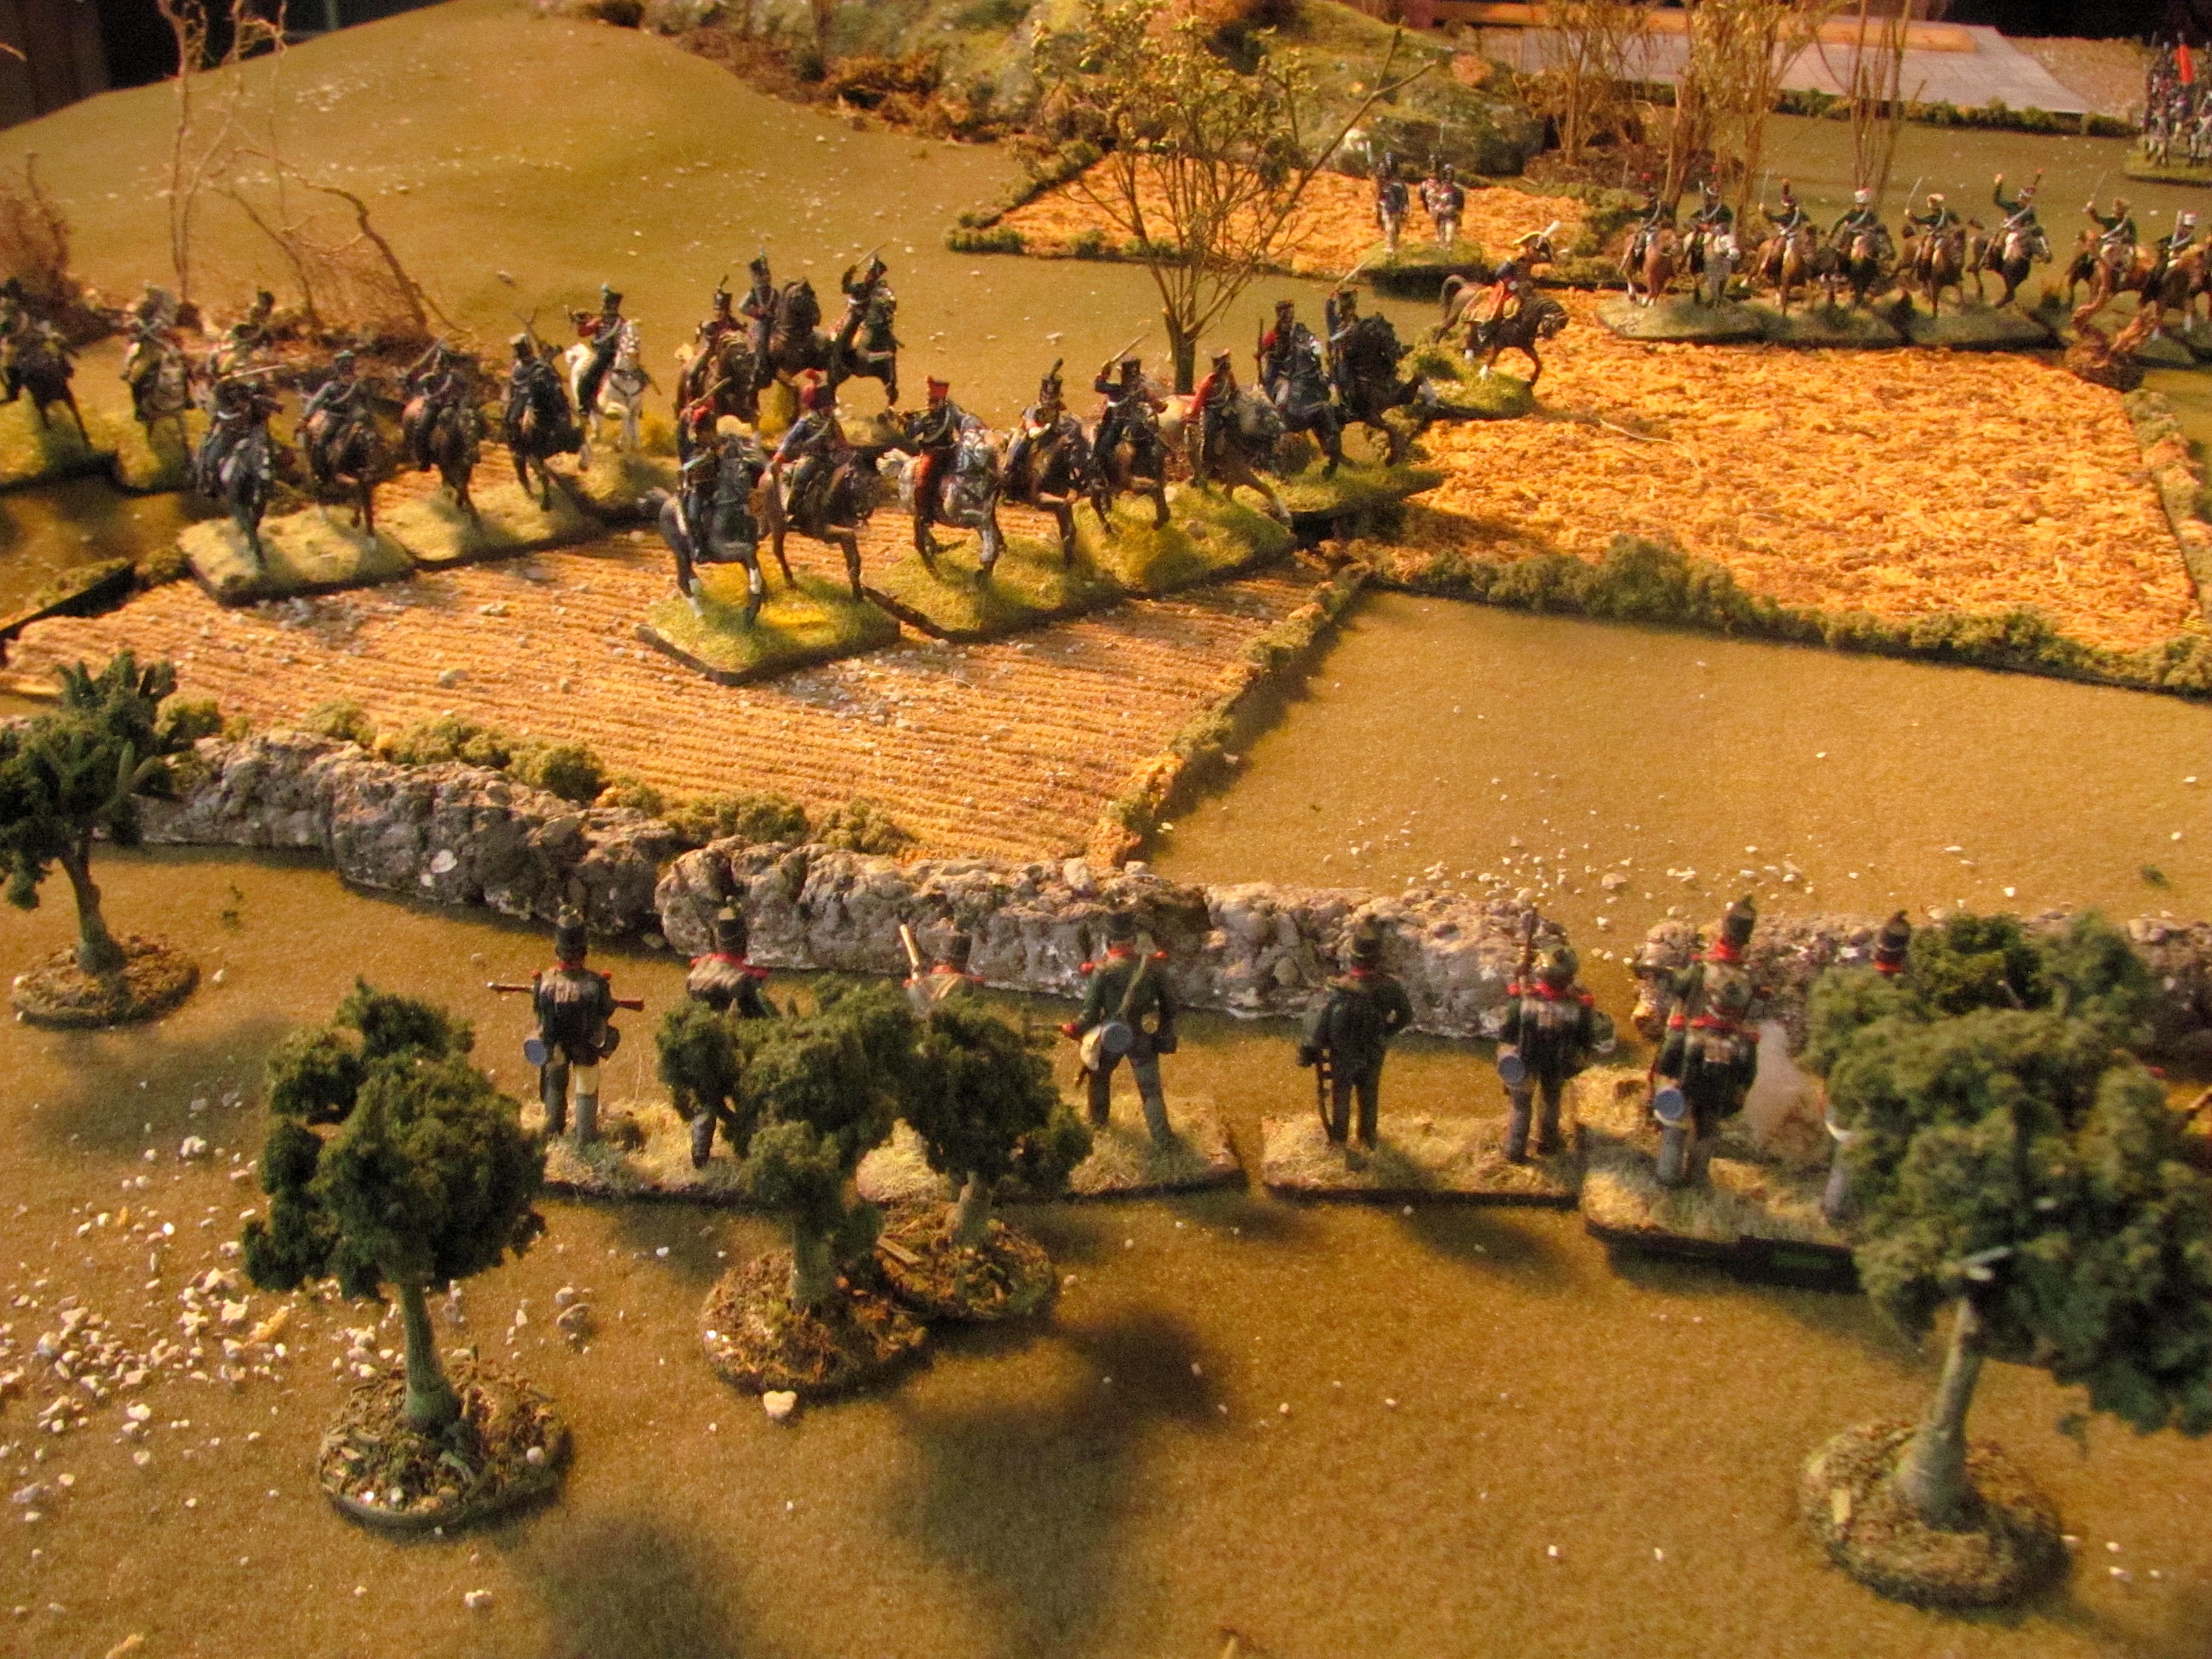

Dragoons dismount

Reaching the edge of the orchards, the Dragoons dismount and move forward in skirmish formation towards the river’s edge.


Colbert's 3rd Hussars threaten Rifles

Meanwhile Colbert’s brigade threatens the village, pinning the Rifles and keeping them from harassing the Dragoons.


Reynaud's brigade arrives, along with Merle

At this point the French infantry, a strong brigade under Reynaud made up of three battalions each of 4th Legere and 15th Line, arrive on the battlefield.

Merle arrives with them and begins to organize the assault on the British position.


Overview

In this overview top left you can see Reynaud’s forces forming up behind a screen of Colbert’s Chausseurs. To the right and below this the 3rd Hussars threaten the Rifles north of the village while the Dragoons arrive on the French right (bottom right) to dismount and move forward through the orchard towards the river.


Merle prepares to assault Cacabelos


Skirmishing across the river

Both sides exchange musket fire over the river as the Dragoons encounter the 1/52nd companies that had been dispatched to shadow their approach.


Rifles reposition north of the village

At the same time the two Rifles contingents link up in the orchards as it becomes clear that the French attack is all weighted north of Cacabelos, with the 15th Chausseurs now threatening to charge.


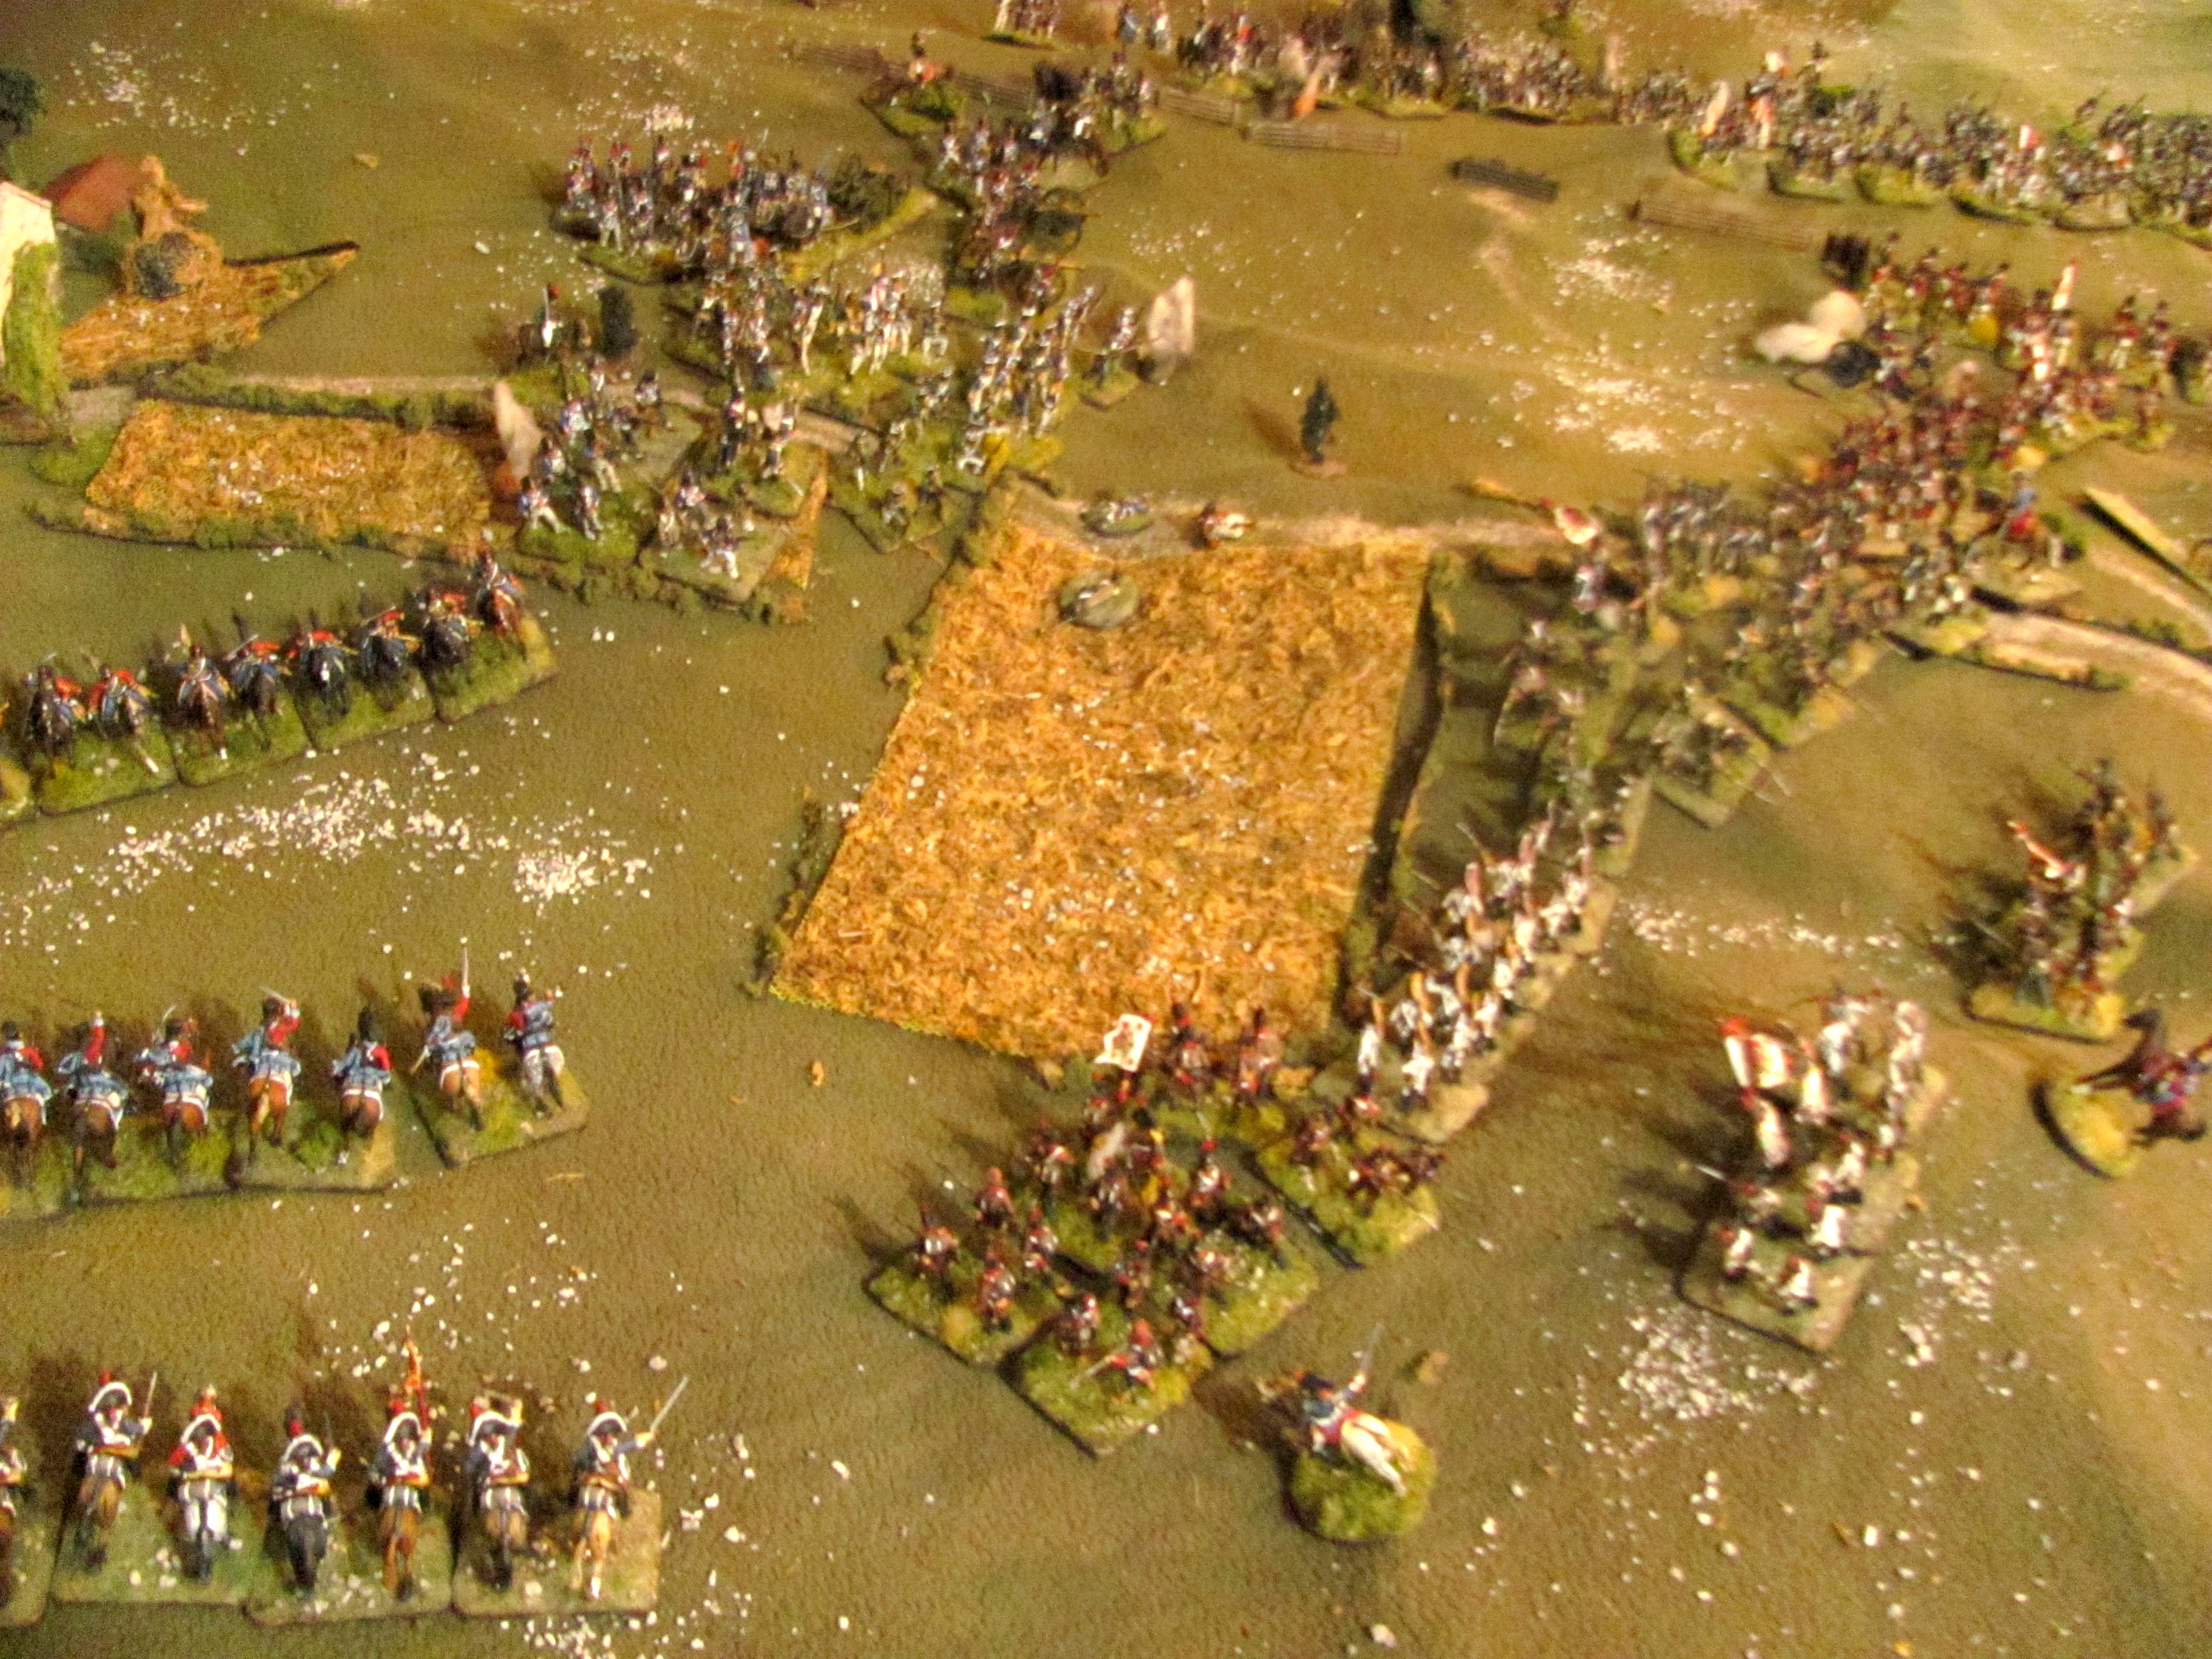
Reynaud assaults Cacabelos

The entire 4th Legere regiment, three battalions strong assault Cacabelos in columns of division. Merle hopes to throw the British out of the village quickly, not wanting this thorn in his side as he tries to push across the river.


…while 15th Chausseurs charge Rifles

At the same time Colbert leads his Chausseurs against the Rifles. But the Rifles position within the confines of the orchard makes it difficult for the French cavalry to effectively charge.


Battling it out at Cacabelos

A vicious battle erupts around Cacabelos, but the 1/20th are well protected within the village and the 4th Legere takes a beating.


Reynaud's attack driven off

The Legere are driven back, suffering heavy losses.


…as is the Chausseurs’ attack as well

A heavy volley from the 1/95th breaks the French cavalry attack before it can make contact and they fall back behind the 15th Line. Colbert is killed in the volley (at least we got that right!)


1/20th march out of Cacabelos

Taking advantage of the bloody nose inflicted on the French, Paget decides now is the time to reconsolidate on the west side of the river. The 1/20th, flush with victory, march out of the village, screened by the Rifles.


Rifles also begin to withdraw across the river

The Rifles in turn withdraw across the river in stages, covering each other’s retreat. But the French are too busy regrouping to give any serious challenge to the retreat.


While Disney moves to the British left 

The consolidation of Anstruther’s brigade on the west bank frees up Disney to move over in support of the 1/52nd companies on the far British left. The 1/95th moves to hold the bank, in line with the 1/53nd on their left while the 1/28th support.


Alan reconsiders his options...

While the British guns, now moved to the high ground behind the British lines, continue to shell the French beyond the river, Alan takes a moment to reconsider his strategy after receiving this drubbing.


Moore arrives

About this time Moore arrives to find all well and Paget conducting a solid rearguard action. He has little to do other than make a few suggestions to the gun crews regarding potential targets.


French occupy Cacabelos

The French march into an abandoned Cacabelos as Merle decides on his next course of action. But the sun is lowering on the horizon and time is running out.


Dragoons abandon right flank attack

A ford is found over the river on the French right, but Merle decides that this flank is now too strongly held by the enemy and calls off the advance here. The Dragoons mount up and gallop off.


Overview

In this overview you can see the French infantry cautiously entering Cacabelos. The last contingent of Rifles is still in the orchards next to the town but are ready to pull back to the west bank to join the rest of the rearguard.


Skirmishing in front of Cacabelos

The 4th Legere begin skirmishing with the Rifles west of the village as they approach the river to search out a possible crossing.


Looking for a ford south of the village

The 3/4th Legere reach the river bank to begin searching for a ford.


1/20th form square in front of the bridge

With the Rifles now all safely on the west bank Paget orders the 1/20th into square in front of the bridge, guarding against any attempt to take the bridge with a cavalry charge. On either side Rifles take up positions along the river in support of the 1/20th.


Game end

And with that the game ends, in a fizzle rather than a bang. The scenario had a variable turn length and it ended early, on Turn 11. As can be seen the west bank is still firmly held by the British, and with very light casualties the British definitely carried the day. Overall it was a very interesting game. More maneuver than fighting, after being so badly blunted in their one and only attack time ran out for the French before they could recover and night fell, allowing the British rearguard to slip away, having succeeded in holding up the pursuit by another day.


Sunday, January 28, 2024

The Battle of Belchite June 18th, 1809

A couple of weeks ago Alan and I got into another of Brian North’s Spanish/French scenarios, this one based on the Battle of Belchite, June 18th, 1809. It follows up chronologically the battles of Alcaniz and Maria, which we had played previously. From Brian’s introduction:

“Belchite is the third and final battle in the duel between the III Corps of Louis-Gabriel Suchet and the Army of Aragón y Valencia of Joachim Blake for control of Aragon in 1809. It takes place a mere three days after the Spanish defeat at Maria, which had thoroughly demoralized the Spanish army, filled up as it was with thousands of new recruits. In fact, when he paraded his army at Belchite, Blake discovered that he had lost about 2,000 men who had disbanded to return home, in addition to the heavy losses at Maria. As a result, even after incorporating Areizaga’s division that had not fought at Maria, Blake was only able to put about 12,000 men in line. For the first time he is at a numerical disadvantage to Suchet, who had called in Laval with his first brigade (2,000) in addition to the reinforcements (3,000) that Robert brought at the crisis of the Battle of Maria. Suchet, in his memoirs, claims that Blake received reinforcements of 4,000 men from Valencia on the eve of the battle, but both Spanish accounts and Oman consider this the usual exaggeration by French marshals. Historians therefore have difficulty understanding why Blake chose to risk battle again with his army’s morale shaken.”

Tell me about it! As the Spanish commander things could only go badly for me, although the Spanish started bravely enough. The game was played on a 6’ X 10’ table, using my 1/72 scale toy soldiers and the Over the Hills rules.

The scenario map. 


The Battlefield

The Spanish forces are entrenched on the heights either idea of Belchite, but mostly to the west of the village (above). A steep escarpment backs their lines, with the only road exiting the position passing through the walled village of Belchite and past the fortified Convent of Santa Barbara.

Roca's Division, emplaced around Belchite

The Spanish left is thinly held, with Roca’s Division holding the high ground east of Belchite, the gardens and orchards in front of the town and the line immediately west of the village.


Spanish centre

In the centre Lazan’s Division borders Roca with Lacy’s Vanguard further to the west (right).


Areizaga's Division on the Spanish left

Areizaga’s very strong division, still intact as it had not been involved in the earlier fighting at Maria, holds the Spanish left. This flank is a bit in the air with the very real possibility of it being outflanked. Ibarrola’s cavalry guard the flank.


Olivenza held in reserve behind Spanish centre

Blake keeps O’Donoju’s cavalry (Olivenza and a contingent of Santiago) in reserve behind the centre.


Spanish ammunition park behind Belchite

Blake positions his ammunition park directly behind Belchite and the Convent of Santa Barbara. This proves to be a big mistake...


Fabre's brigade leads the French attack on Spanish left

Suchet leads off with Musnier’s division advancing on the Spanish left with Fabre’s brigade  in the lead.


4th Hussars cover Fabre's flank


Suchet surveys the Spanish lines


The 5th Legere enter alone on the French far left


Spanish lines wait for the French advance


Ibarrola's cavalry protect Areizaga's flank

The French 4th Hussars quickly square off against Ibarrola’s cavalry, but evenly matched, neither side wants to risk battle.


Laval's Division enters the field opposite Belchite 

Haber and Chlopicki’s brigades, eight battalions strong, enter in front of Belchite. Suchet plans to use these units to pin the Spanish right while throwing his weight against the Spanish left.


Robert marches on Spanish centre while Wathier's massive 13th Cuirassier Regiment moves to left

Robert’s big brigade, six battalions of infantry, appear in front of the Spanish centre and move forward to attack. Suchet plans to make quick work of the Spanish rabble, mostly militia, holding the line here. Meanwhile Wathier’s 13th Cuirassiers along with their artillery, a 6” howitzer half battery, gallop off towards the French left.


Verges' brigade follows up Fabre on French right


Roca's cannon open fire on Laval's Division

Laval’s forward troops, seeing the Spanish horse hovering behind the enemy lines, form up into squares as Roca’s half battery opens fire.


Overview

This overview shows all of Suchet’s forces now arrayed on the field in front of the Spanish lines. Robert and Musnier, top right, will lead off the attack while Laval (bottom right) demonstrates at a distance in front of the Spanish right. Top centre Blake, already having his line outflanked, has ordered Areizaga to pull back the Spanish left, abandoning their entrenchments without a fight. Bottom left Roca has moved the 2 Saboya down from the Cerro del Calvario and into the orchards in front of Belchite.


Robert charges Almeria

Robert hits Lacy’s Vanguard with four battalions in column attacking abreast.


Robert repulsed!

But the attack is over before it begins. Robert is repulsed, taking heavy losses, with one battalion broken and two others routed. Badly bruised Robert is forced to call off the attack until he can get his troops rallied.


America marches to Belchite

Blake, feeling that his right should hold for now, pulls Hernandez’ brigade (America 2 and 3) and marches them back with their zapadores contingent to occupy Belchite and support Roca. Now seeing that he is clearly outnumbered on the field, Blake wants to make sure the door to his escape route can be kept open long enough to let his army get away if things go badly. This turns out not to be a brilliaint move on the Spanish side, given how things unfolded!

The rest of the Spanish line shifts to the right to close up the gap as Areizaga continues to draw in his left flank.


America occupies Belchite


O'Donoju's Santiago charge into Chlopicki's 2nd Vistula

Seeing an opportunity, Santiago, in the centre, pounces forward through the Spanish lines. The Poles manage to close ranks and Santiago, surrounded by French infantry, quickly withdraws.


Musnier assaults Spanish left

Meanwhile on the Spanish left Musnier throws Verges against the retreating Spanish.


... and is also driven off with heavy losses!

And again the Spanish militia out perform, breaking one battalion and routing a second - leaving Verges tottering on the edge of his entire brigade being broken. With both Robert’s and Verges’ attacks soundly beaten and the two brigades teetering, Suchet appears to be in trouble.


French howitzer goes into action

But the French commander has received word that the Spanish artillery park has been located dangerously close to the front, behind Belchite. He orders Wathier’s half battery of howitzers to turn their attention to that, dropping some shells behind the Spanish lines.


... and scores a direct hit!

On their second round of firing the howitzers score a direct hit.


Entire Spanish right panics and flees

In a moment Blake’s luck shifts. Fearing that the enemy has gotten to their rear, a cascade of Spanish panic and break, with the entire right flank (all of Roca’s Division and Hernandez’ America battalions, which have just recently occupied Belchite) fleeing the field! (Historically, a version of this event happened, leading to the entire Spanish army retreating from the field. In our game the howitzers had a 1 in 10 chance of scoring a hit, and managed to do this on their second round. At this point the game victory conditions change, and if the Spanish can withdraw the majority of their remaining forces intact from the field, they can still achieve a minor victory.)


Overview

In this overview you can see that little stands in front of Habert’s brigade (centre right of photo) on the Spanish right as Roca’s division and Hernandez’ brigade flee the field (bottom left). Above centre the Spanish line now forms an elbow, with Areizaga facing off against Musnier and Lacy’s and Lazan’s troops still in their entrenchments opposite Robert’s and Chlopicki’s brigades.


Areizaga begins to withdraw

Blake eventually gets orders to Areizaga to draw in his line and withdraw towards Belchite, freeing up units as he can to shift to shore up the Spanish right. But the retreat is slow, with the militia units not really cut out for these sorts of maneuvers and the French 4th Hussars always threatening the Spanish left.


French pour into breech on Spanish right

Again luck is with Suchet as orders had just gone out to Lazan to attack at the same moment the Spanish right disintegrated. Habert’s brigade, with a small contingent of Polish Lancers in support, quickly sweeps over the abandoned entrenchments moving to cut off the Spanish retreat.


O'Donoju's cavalry threaten Robert

Unfortunately the Spanish cavalry are no where around to stem this attack as they are engaged in front of the Spanish centre, threatening Robert. Blake sends out an ADC to get O’Donoju back again behind the lines.


Overview

The situation is very fluid. At the bottom, Pirez desperately tries to fend off Habert with 1st Valencia and the Cazadores de Valencia, while above Areizaga slowly falls back. Lacy and part of Lazan’s Division still hold the centre.


Cazadores de Valencia drive off 2/14th

The Spanish retreat is in great danger of being cut, but the Spanish keep pulling rabbits out of their mixed headwear. Here the Valencian Cazadores drive off an assault by the 1/14th with musket fire.


2/2 Vistula Shatter 1/Almeria

Chlopicki’s 2/2 Vistula goes on a rampage, driving back 1/Almeira and then routing them.


... and destroy Lazan's artillery

And follow up with an assault on Lazan’s half battery, which had just limbered up and was moving to support the right flank.


Lacy's brigade broken

Routing Spanish pour past Blake’s command group as Lacy’s brigade finally breaks. Amazingly Pirez manages to rally the remains of his own broken brigade, with 1st Valencia standing fast.


Areizaga slowly pulls back

On the Spanish left Areizaga continues to slowly pull back his wing. On the bottom right Carbon’s grenadier battalion has been pulled out of the line to go bolster the right along with some of the second line smaller militia battalions under Areizaga’s command. Lower right the cavalry continue to play cat and mouse with neither side wanting to be the cat. Musnier is under orders not to engage, simply to advance in the wake of the retreating Spanish while Laval rolls up the Spanish right.


Cavalry clash on Areizaga's flank

With time running out, the Spanish decide to gamble all. Santiago charges the 4th Hussars, who countercharge.


Ibarrola's Santiago broken but Hussares Espanoles save the day

Santiago is easily broken and the 4th Hussars follow up with a charge on the Hussares Espanoles. But the weaker Spanish horse dig deep and thrash the French, sending them routing to the rear. However, this does little to improve things as the Spanish militia can only pull back slowly and Musnier continues to press forward, albeit a bit more cautiously with no cavalry support.


4th Hussars routed


French advance on centre

However, Robert, now well-rallied, advances on the Spanish centre. The presence of the 13th Cuirassiers here has thrown the Spanish into squares, losing the advantage of their emplacements. Suchet sends an order to Musnier to also attack but the ADC cannot find the divisional commander on the chaos of the battlefield. A second order, sent to the cuirassiers to support Laval’s attack, also goes astray!


Areizaga's battery holds firm

But the Spanish are only warding off the inevitable. Small moments of heroics, like Areizaga’s gunners berating back an attack, are not enough to stem Laval’s attack…


1st Valencia drive back Habert’s Poles with a well-directed fusillade.


13th Cuirassiers finally clash with O'Donoju's cavalry


Santiago routed…


… and then Cuirassiers routed by Olivenza!


Vistula Lancers scattering Spanish behind the lines

By now the squadron of Vistula Lancers has worked its way behind the Spanish lines and scatters further the routing Spanish battalions.


Hussares Espanoles rout Vistula Lancers

But the Hussares Espanoles, having routed the 4th Hussars turn and now drive off the Lancers. But it is too little too late.


Vols. de Aragon ringed by French guns

The French have now maneuvered their guns to within canister range of Areizaga's crumbling division.


Musnier's charge finally driven home

Suchet finally gets his orders through to Musnier who launches an attack on Cucalon’s Vols. de Valencia…


Areizaga is broken

Finally breaking this stalwart of the Spanish defence, pushing Blake’s army over the 50% threshold.


Game end

With their retreat cut off and ringed by French battalions and artillery the remaining Spanish surrender. The battle went 14 of its 16 rounds, with the Spanish tenaciously holding on long after the ammunition park blew up and a third of their force routed. However, as they were engaged on every side and their retreat almost immediately cut off by Laval’s advance into the breach around Belchite, the Spanish were never able to bring sufficient force to bear to break out of the trap they had created for themselves by Blake choosing this particular piece of high ground to make yet another stand against now superior French forces.

All and all an interesting scenario. In our game Spanish orders generally take two to three rounds to come into effect, and this coupled with the slow maneuver rate of its militias made it very difficult for the Spanish to execute the fighting retreat that they needed to execute in the second half. The game would be quite well balanced if the park did not go up in flames, and the scenario could certainly be played without that option being available, but that historic event made for an interesting mid-game switch up and breathed life into a failing French attack!